Thursday 8 December 2016

Autumn 2016 3D Printing Adventures Update - TCT Show 2016 highlights, projects and new machines & materials


Autumn 2016 3D Printing Adventures Update 

The TCT Show was back at the Birmingham NEC Arena. This is one of the very best 3D Printing exhibitions anywhere in the world, if you get a chance to visit, make sure you register for next year and give yourself plenty of time. There are lots of suppliers, manufacturers and interesting people to meet and talk too.

I was at the show again this year for both days, here is a brief rundown of some highlights from the show, it's by no means all. This was one of those shows that I wished I had taken more photo's. I did manage to speak to many different people and visited almost all the exhibitors this time around.

My video update for Autumn is below, and contains both information from the TCT show along with materials, machines and an update on current and future projects.

You may also want to check out the new 3DHubs 2017 3D Printer guide - https://www.3dhubs.com/best-3d-printer-guide I mention a few machines that won awards in the video including the BCN3D Sigma, LulzBot TAZ6 and the Prusa MK2 i3


This is also over on YouTube in HD, click here for my channel.

First up a big thank you to everyone at E3D for providing me and Thomas Sanladerer with an operational base and generally looking after everyone in the desktop printing sector. The E3D stand's were buzzing all day, all the time, it was a great place to talk and meet people. Even the after-show party managed to congregate all around the E3D stand for most of the evening until around forty of us all packed into a local pub for a cracking roast dinner :)

So let's start with E3D and all the great things they had on show (and a few more that are/maybe coming soon) -


Firstly E3D had doubled the size of their stand this time, one half showing off their range of Spoolworks filament materials, and the other dedicated to hot-ends, nozzles, the Titan extruder and many other goodies.

E3D Copper Nozzles...

For anyone with a keen eye, you may have spotted that E3D had some copper nozzles on show. This may sound like an odd choice of material for a nozzle, but they will be appearing on 3D printers soon, so keep a lookout for more news.

Talking of nozzles, the E3D team have been working on some very special 'tiny' nozzles for super small and detailed 3D models.


These were printed with a 0.15mm nozzle in ABS. You really have to see them to fully appreciate the level of perfect detail and stunning quality being achieved with these nozzles.


More info - E3D Tiny little nozzles - http://e3d-online.com/High-Res-015-Nozzles

The detail in this chess set is astonishing for any 3D printing method, let alone FFF (FDM). A spool of filament would last for many, many models at this tiny scale.

These were also printed on a standard Mendel90 fitted with an E3D V6 hot-end, nothing special - but with a dedicated high-resolution machine we could see even more capabilities for these tiny sized nozzles.


E3D has invested heavily in expansion of their business in the past 18 months, taking on more people in development and research, we should be seeing many more great things coming from E3D so do keep an eye out.

Bondtech extruders and Emvio Engineering - https://emvioeng.com/extruder-mechanism-upgraded-bondtech-dual-drive/

Emvio Engineering had a really nice BCN3D Sigma setup with custom mounted Bondtech extruders.


They also kindly sent me a set for fitting and feedback in my BCN3D Sigma 3D Printer.


I'm doing a separate video and blog post on the entire process of fitting, setup and using the Bondtech extruders in a Sigma 3D Printer.

I'm really impressed with the upgrade and initial printing results. I'll post more as soon as I have completed more comparison prints and tested as many different materials.

LulzBot (Taz 6) - 

LulzBot was at their first international show for the TCT event. It was a total pleasure to talk to them and discuss all aspects of the LulzBot company, machines and amazing way they go about Open-Source 3D printing.


James Bruton from Xrobots.co.uk was also on the LulzBot stand, if you don't already know who James is, then do please check out his amazing YouTube channel (lots of robotics, 3D Printing and Cosplay)

James also did a great TCTshow video about LulzBot you can see here 

LulzBot also sent me a TAZ 6 in November, so look out for more video's, blog posts and discussion about my experience of using the TAZ 6 3D Printer soon.


Simple to setup right out of the box.


After a few minor issues, I was up and running - with a quick Benchy3D print in Colorfabb nGen.


The TAZ6 is very busy printing all sorts of models in different materials (lots of Christmas) so look out for an update soon on setting up and using the LulzBot TAZ 6.

Lulzbot (Taz 6) - https://www.lulzbot.com/store/printers/lulzbot-taz-6


More TCT Show and links - 

This time at the show there was almost too many more companies to list, but here are a few more I spotted and talked to at the 2016 TCT Show.

eMotion Tech - (Micro Delta Rework printer) - https://www.reprap-france.com/

Hawk3DProto was another great base for me to use during the TCTShow. A big thank you to Ben and also all the team from BCN3D.

Ben was also very kind to give me some Proto-Pasta Matt Fibre HTPLA Filament for testing - https://www.proto-pasta.com/collections/matte-fiber-htpla

I hope to be doing some hands-on 3D Printing training with Ben on-site at Hawk3DProto in the new year. If you are in any way interested in taking part of getting involved too, do get in contact with me on Twitter about this @RichRap3D


Hawk 3D Proto and BCN3D Technologies - http://www.hawk3dproto.co.uk/bcn-3d-sigma.html

HP and their Multi-jet fusion technology - http://www8.hp.com/uk/en/printers/3d-printers.html

Photocentric -

Photocentric - http://www.photocentric3d.com/

Polymaker (Polysmooth Polysher - Kickstarter etc.) - https://www.kickstarter.com/projects/polymaker/polysmooth-and-polysher-3d-prints-without-layers/description

Prusa Printers / Prusa Research (MK2 + 4 extruder add-on) - http://shop.prusa3d.com/en/printer-upgrades/118-original-prusa-i3-mk2-multi-material-upgrade.html

Silicone 3D Printing - http://www.picsima.com/

Magigoo (3D Printing bed adhesive) - https://magigoo.com/

Printrbot Simple V2 (2016) - https://printrbot.com/shop/simple-v2/

The team at 3D Filaprint had a great selection of materials, components and items to make 3D printing easier.
3DFilaprint (3D Printed Working Pinball machine - Wow!) - http://3dfilaprint.com/tonys%20pinball/


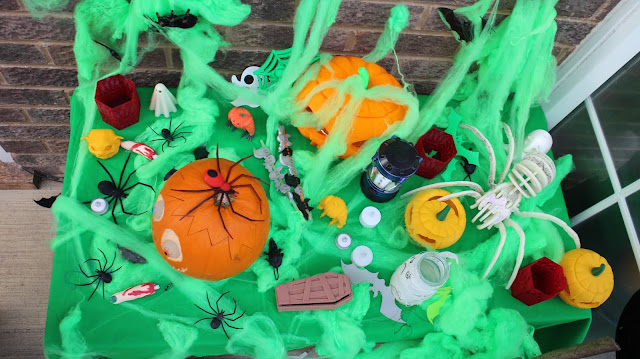
Haloween 3D Printing - (mostly testing out the Prusa i3 MK2 with lots of different materials) -

Halloween coffin pot (Design by Martin Moore - Files over on MyMiniFactory) Printed in Filamentum Cinnamon wood filament - https://www.myminifactory.com/object/halloween-coffin-pot-decoration-24554

Spider Pendant (Design by upalermo - Files over on Thingiverse) Printed in Flexfill 98A soft filament - http://www.thingiverse.com/thing:1785811

Treat bowl (Design by Tony Short - Files over on Thingiverse ) Printed in Polyalchemy Elixir Green and Orange using the colorprint software by Prusa research - http://www.thingiverse.com/thing:1074374


Autumn leaves (Designed by Faberdashery - Files over on Youmagine) - Printed in Recycled PLA filament - https://www.youmagine.com/designs/autumn-leaves


Graphica Mega Ghost (Designed by 3Dkitbash - Files over on Youmagine) - Printed in Fillamentum Extrafill PLA Luminious Orange filament - https://www.youmagine.com/designs/graphica-mega-ghost-print-play-via-3dkitbash-com

Ghosts (Designed by muzz64 - Files over on Thingiverse) Printed in Polyalchemy Elixir natural PLA (glossy white) - http://www.thingiverse.com/thing:1777164

We printed a lot more to add to the ever growing Halloween collection - Above includes many more objects that have been printed for Halloween over the last few years.

Lots and lots of Christmas printing at the moment, testing out lots of materials, devices and even a very cool Laser engraver upgrade (for 3D printers) - more on these projects soon.

It was really great to talk to so many people and companies at the TCTshow. If I missed you out in this post I'm sorry it was just such an amazing event this year, I spent almost all my time talking to people and not enough time taking pictures or video to share.

I'll try to get in a few more posts and video's before Christmas, I still have lots and lots more to share, many more projects and adventures with all manner of 3D printing devices.

See you all very soon.

Richard.


Tuesday 20 September 2016

Building and using the Prusa i3 MK2 3D Printer - Dad and Daughter Kit build

The Prusa i3 MK2 3D Printer

It's early September and I had a surprise delivery from none other than Josef Prusa. It was double the surprise when I realised - not only did Jo send me a shiny new fully assembled and tested MK2 i3 Prusa 3D Printer, but he also included a kit build of parts for the same machine too. Wow!

For anyone that does not already know, the i3 is a many-times evolved version of the RepRap Mendel (And a bit of the Mendel90 is there too), a design by Ed Sells that quickly got simplified by Josef Prusa, and then highly adopted all around the RepRap 3D Printing community - we are talking around 2010 ~ 2011.


After removing the assembled machine from it's well packed box, the first thing I spotted was a dual colour 3D Print Prusa logo fixed to the heated bed. It made me smile for many reasons, but mostly because it reminded me of the first time I met Jo. This was at the very first RepRap UK Masterclass in Bath University - the birthplace of RepRap.


This RepRap event turned out to be a rather epic meeting, organised by Adrian Bowyer (RepRap Ltd) and Jean-Marc from eMaker who had just had a successful crowd-sourcing campaign for the eMaker Huxley. You can read all about that event, and see what we did, but for me it was also just when I had first posted all about my attempts to do multi-colour 3D printing by selecting different layers. People had read about the post and talked to me at the RepRap Masterclass event. Jo has now done a really nice application (called colorprint < American spelling...) where you can also add colour changes, you can get that here, and that's why the Dual colour Prusa logo on the build-plate made me smile :)

RepRap Masterclass July 3rd 2011 - Bath university (UK) - Image (C) by Dr Andrew Dent.
RepRap Masterclass July 2011 - Photograph above is by Dr Andrew Dent (Faberdashery) - who I also met for the very first time at the build weekend, just before Faberdashery was launched.
I'm on the far left and Josef Prusa is front far right.

After looking over the machine and it's components I obviously asked a few questions, many had an interesting story attached and really highlights why using your own products in production makes for a much better product being sold.

Firstly the heated bed is really solid, but not heavy - it's not an Aluminium plate and it's also not the standard bendy PCB material you normally find fitted to 'i3 style' machines.

This heated bed is the thickest FR4 PCB material I have ever seen. It's ~3.6mm thick and during it's manufacture it has also been compressed - for flatness and to make everything more solid.

I work in electronics every day, so over the years I have used 2.4mm and 3.2mm PCB materials for special things, but this is still the thickest PCB I have seen being used as a heated build platform for 3D printing. I'm confident this is going to do a really good job of keeping the build plate nice and flat, even at temperatures well over 120 Degrees C.

The assembled machine was super easy to get working, just a few printed clamps to remove and a simple procedure to auto-level the printer build platform.

Then the warm-up and loading of filament, and a quick test print from the samples included on the SD Card.

My daughter selected a file called buddy...


And it printed an awesome Pug. We discovered, this was Jo's dog, buddy.

The pre-assembled Prusa i3 MK2 printer was ready to go right out of the box. Just download drivers, and Slic3r profiles and you are ready to print whatever you like.

We then printed many, many more things...

Many people are recommending this as a 'great first 3D printer'. I would go further than that. It's simply a great and very capable 3D Printer for a good price. (The pre-assembled machine is outstanding value for money - when you consider the time to build one yourself). That said I would always recommend the kit if you have the confidence to build it up. 3D printers do break and you will need to service them. If you can do Ikea, you should be able to build this kit.

I expect the team at Prusa Research is going to be constantly busy selling these machines, if you want to order one or take a look at the specification in more detail, please click here.

I will post more about the assembled machine and it's capability, but let's move on to the i3 MK2 Kit.

Dad and Daughter 3D Printer build - 

Anyway, back to the subject of this blog post. My youngest daughter  Sophia (now 8 1/2 Years old) is very excited to be building up her first 3D Printer. I'm going to document it and let you know how we get on with the Prusa MK2 Kit build.

The video below is looking at the Kit components and preparing to start the build with my daughter.


My oldest Daughter is now 11. Last summer she also built up her first 3D Printer. That was a RepRapPro Fisher Delta printer (yes, one day I will post all about that build too). It's done a fantastic job, but now I think they are both ready for a machine with a heated bed and greater build area.

Take a look at the unpacking and first thoughts on the fully assembled machine in the video below. Or you can watch it directly on YouTube here in HD.

Looking at the assembled Prusa i3 MK2 3D Printer

Thanks for reading. Join us next time where we build up the rest of the Prusa i3 MK2 3D Printer kit.

Richard.


Friday 16 September 2016

BigBox Duet Wifi Upgrade and Polyalchemy Elixir PLA filament testing

BigBox Duet Wifi Upgrade

During the summer I decided it would be good to upgrade the electronics in my E3D BigBox. I had already made some modifications adding extruder expansion to the RUMBA and experimenting with a over-complex automatic tool-changer system... more on that soon.

I was about to order a new electronics set, when the Think3D-Print3D team contacted me to see if I would be interested in looking at a beta version of their new Duet Wifi 32bit ARM RepRap electronics.


Obviously I was thrilled to take a look and I had an ideal machine in the BigBox to test it out.
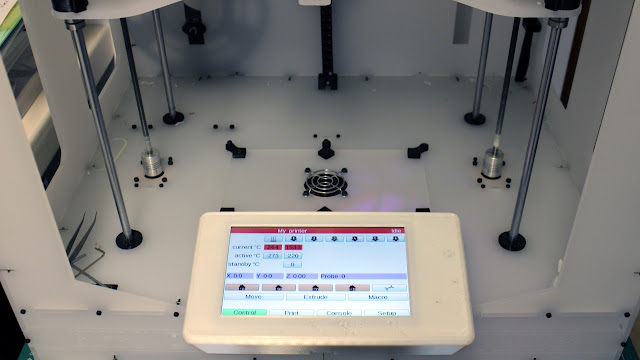
Not only that but I also got the chance to try out the full colour 7" touch-screen for the DuetWifi too.


7" Full colour Touch screen interface - with it's own microcontroller, so you don't get any slow-down or drop in performance of the electronics by using it.


You can also watch this video over on YouTube in HD - you can subscribe to my channel too :)


At the same time I was contacted by Polyalchemy to see if I could try out a new type of 'modified' PLA called Elixir. That was also good timing as setting up any new electronics, firmware and mechanical system will use plenty of material in calibration and tuning for quality and speed.


Quality packaging, well sealed and Made in China.


Standard Spool size with 1Kg of filament (1.75 or 2.85mm)


I get asked to look at 'new' filaments and materials all the time. If it really is something new or different I'm happy to take a look and feedback print results and compatibility etc. The one thing that I find disappointing is when I work out the filament is just re-branded from an existing supplier or labelled up as a 'new', 'special' or 'eco-friendly' product when it's just the same as already on the market. There is nothing really wrong with this, apart from when people don't tell me - after I directly ask. I do try to look out for materials that have had some of their own development or innovation - or just people who genuinely want to make something good for the 3D printing industry and not just to cash in. Polyalchemy were looking to make something a little different - and for it to be very silky.

I was sent various test-sample grades and colours of the Polyalchemy Elixir filament over the summer, testing and feedback allowed some final tweaking and they have now released the first of their filaments for sale - natural white, you can get it here. 

Just to make it clear - I have no connection to Polyalchemy, I just found the material to be interesting and different from the everyday colours and finish of normal PLA. I tested it out on every machine, and had no problems with any of the different extruder systems or hot-ends from various manufacturers. It prints like normal PLA - I found a little extra heat would improve extrusion speed -I normally print PLA at 195 Degrees C. I ended up using Polyalchemy Elixir at around 208 to 215 Degrees C.


Some 'experimental' colours - very nice to print with.


If you need something with a very smooth and silky finish then this may be a good material for you to try out. I can genuinely say that many of the parts I have printed in this material now have prime locations all around my house. It's been one of the only filaments that my entire family have all wanted to be on display. They look less like plastic prints and more like artwork or quality made products, for that alone I am delighted.


I'm going to keep an eye on what Elixir colours are released next. As you will see below and in the video I have tried out a few, some are nicer to look at than others, but the natural white is a very good starting point for beautiful looking and artistic 3D Printed models.

Back to the BigBox Duet Wifi upgrade - 

My first task was to get the BigBox into a similar condition to my Steampunk BigBox - this involved a new heated bed, various modifications to the print carriage - now using my quick-fit version.


I only had an old style E3D Volcano heater block, so a quick modification to drill a new hole - added support for the new temperature sensing cartridges (therm / PT100 etc.)


Some other changes included a change to 400step motors on all axis and some hand-modification of E3D Volcano heater-blocks to hold the new style thermocouple cartridges.

Wiring needed to be modified for the Duet Wifi electronics, but most of the changes were to remove the RUMBA and replace.


The Duet Wifi board has been a joint development with Think3DPrint3D and also Escher3D - David Crocker at Escher3D also designed and manufacturers the Infra-red bed sensor's used on the BigBox Printer. David has also designed the PanelDue LCD touch-panel screen for the Duet board. I found this LCD screen was a very nice upgrade indeed!

I'm going to order another set of DuetWifi electronics. The firmware is soon to get dual independent extruder control so I'm very tempted to replace the BCN3D Sigma electronics with the DuetWifi system.

This is one where it's good to watch the video, so please let me know what you think and I'll share more about the BigBox Duet Wifi Upgrade if anyone is interested.

Thanks for reading, let me knwo what you think and if you are interested in also usign the Duet Wifi or testing out Polyalchemy Elixir PLA?

Until next time, thanks for reading.

Richard.