This post sees the release of my 3DR Delta printer design. I know a lot of you have been asking for it. I had planned to do another monster post on full 3DR assembly, but as documentation is taking much more time to get completed, instead of delaying the release any further I thought it best to do a series of Blog posts to show assembly, setup, calibration, and firmware config in stages.

3DR (V2_001) Release.
This post will be Part 1 - Release files, print some plastic parts and source other materials.
In future posts we will look at the following as a guide to the whole process of building and setup of a 3D printer.
Link > Part 2 looks at preparation of parts and starting assembly of the 3D printer and extruder.
Link > Part 3 tackles the final machine assembly, hot-end, electronics setup, and wiring.
Link > Part 4 gets to grips with the firmware, setup, calibration and first movements of the Printer.
Part 5 will see us setting up Slic3r with 3DR, use some test parts to level our bed and have some 3D Printing Fun!
If you missed my Intro video last month about 3DR, take a look at the video below, I explain some of the reasons I designed this printer.
I also had it running live and printing all sorts of multi-coloured objects (that's another future post :) at the recent London Mini Maker-Faire,
A really big thank you goes out to the faberdashery team who kindly offered me space on their stand to show off 3DR, we had a great day and a lot of fun!

3DR attracted a lot of attention for the entire Maker-Faire day, much more than I expected. It was also great to meet and talk to so many of you who follow my work, read my blog and were also inspired to do something or even start businesses in this great booming industry, thank you all, it really made me very happy.
In past years I have done many different 3D print colour mixing developments, so for the Maker-Faire I had the very British Red,White and Blue 3DR setup with a dual bowden fed extruder mixing Hot-End Nozzle, allowing some nice looking prints to be made during the day. Extruders and the blends of filament feed are controlled in Gcode, still experimental at the moment with this two channel and a new four channel fed bowden version, still some rather complex mixing control to get sorted, but looking very promising!

Here are a few photo's of some of the objects we printed using the fine filament faberdashery provided to all exhibitors during the faire. It's a fast, accurate, and quiet printer, I hope you like it and decide to build one.


Gear Vase Designed by JelleAtProtospace
This was a popular one - the colours mix between clear at the bottom, bands of increasing rainbow and gold eventually fading into silver. - Print time of 67mins / 0.125mm layers @ 105mm/sec 0.3mm mixing nozzle.

A Joris Weekly cup (Nr22) printed in Bling Bling Gold, mixed with various rainbow colours.

A collection of other prints I did just before the Maker-Faire, and one very important thing to point out here, this Printer is not just for Pots and Vases! it was just a lot quicker to test out the Gcode mixing settings with a whole load of different single wall printed objects. This printer can print anything my MendelMax can and at better quality and speed.

Hex Cut bottle designed by Perry Engel (Cerberus333)
I had a lot of people at the Maker-Faire ask if Delta's are better for printing round or organic objects. I would have to say not specifically, it's simply a different way to position the printing head in 3D space. Delta's can move everything about much faster, so have less chance of ooze or print defects, and you can 'lift' the nozzle a lot on each move because Z is as fast as all other axis (unlike most other 3D printers, that tend to have a slower Z drive) to ensure parts do not get knocked off.
For me Delta's are a natural choice to get things printing faster and ensuring a much better Z axis alignment on parts, so for now I'm developing more Delta printers and improving whatever I can.
So much more I could post about the Maker-Faire but many other people have already covered it well. It was a great experience.
It was also the first time I managed to get 3D scanned by the team at Thingmaker.

They used an Xbox Kinect and swivel stool - producing a full colour .PLY file
I ordered and paid £35 for a full colour print, and a few weeks later this little mini-me turned up!

On with the 3DR release...
3DR - License information -
"Thank you for downloading, please be aware and abide by
the license all these files for the RichRap 3DR Delta printer are covered by -
This License is not greatly restrictive at all, so please
don't forget to attribute my work and acknowledge the work by others that this
is built on.
Many people and projects have provided inspiration for
this printer design. I would like to thank everyone working on RepRap projects
the world over.
Special thanks to - Johann C. Rocholl for all the great
work on Delta printers and firmware.
Sublime for the fantastic Tantillus printer using Spectra
fishing line as the drive component and the various other great parts and
designs used in the construction of this Printer.
I hope this work has been of some use to you, if you wish
to say hello or even donate towards further developments please see the left hand section of my Blog.
Many thanks - Richard Horne (RichRap)
My website - www.richrap.com
Catch me on Twitter @RichRap3D
Watch me on YouTube
Please see www.reprap.org for information about the RepRap
Project.
Please visit the RepRap forum
Please note - All images, photo', video's and drawings on this blog, on external sites and social media resources are copyright of Richard Horne (RichRap) and are not covered under the Creative commons License detailed above, if you want to use an image, video or drawing, please get in contact, in most situations I'll be very delighted to help you."
3DR - Part 1 -
The released model files, design source in Sketchup format, images and other helpful stuff are all now in a Github repository.
I'm using the great Githubiverse template by Gary Hodgson for the release and presentation of the 3DR files and to keep them updated as the design may evolve in the future.
Using the Githubiverse template, presents the project as a formatted Github Page in a similar style to Thingiverse. The page can be viewed here - RichRap 3DR 3D Delta Printer - Githubiverse
Printed Parts -
3DR uses a simple set of 3D printed parts to form the main structure of the machine.
All parts are fine printed in PLA, but you can use ABS if you prefer.
You will need to print our acquire a set... - If you get stuck, give me a shout.
I would recommend printing the following parts with 30% honeycomb infill, two perimeters, ideally with a 0.4mm nozzle and 0.25mm or lower layers.
 3x 3DR_Bottom_Motor_Mount_V2_001_RTP.stl
  3x 3DR_Top_Electronics_Mount_V2_001_RTP.stl
 3 x 3DR_Top_cover_cap_V2_001_RTP.stl
 1 x 3DR_Top_Boss_V2_001_RTP.stl
 1 x 3DR_Bottom_Boss_V2_001_RTP.stl
And also the following parts with 35% honeycomb infill, two perimeters, ideally with a 0.4mm nozzle and 0.15mm or lower layers.
 3 x 3DR_Spool_V2_001_RTP.stl
 3 x 3DR_Carriage_V2_001_for_LM6UU_RTP.stl
(Or try out the optional experimental Brass bushings version)

1 x 3DR_Jhead_groove_mount_V2_001_PUSHFIT_RTP.stl
 1 x 3DR_micro_platform_V2_001_RTP.stl
 3 x (or you can use 6) 3DR_Print_Bed_catch_V2_001_RTP.stl
12 x 3DR_RichRap_joint_and_rod_adapter_VERSION2_001_RTP.stl (use concentric infill)
If you use other types of TRXX style rods, you may not need these.
For the extruder, you can use your own Bowden version or a choice of countless others, or my version -


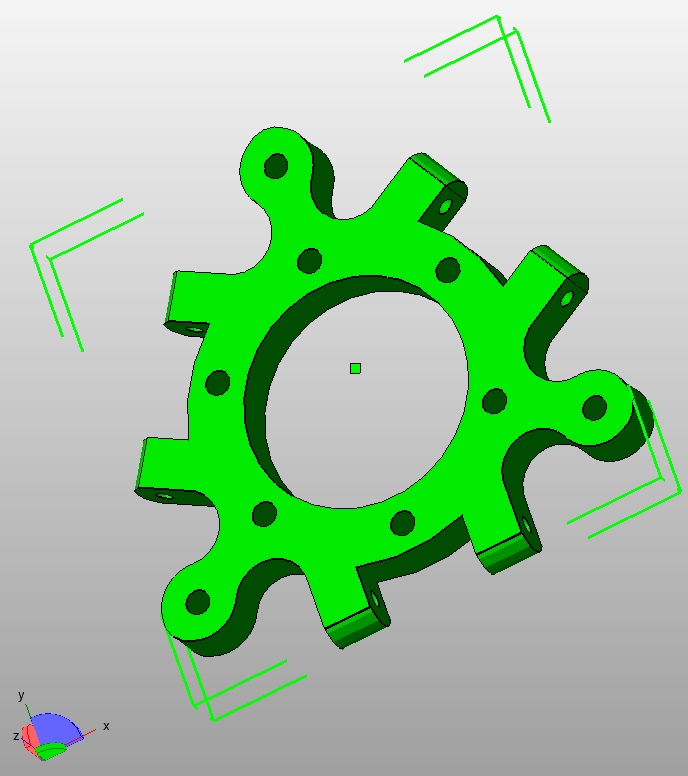
 1 x herringbone-gear-large.stl
 1 x herringbone-gear-small.stl
The Gears are the Triffid Hunter design, you can use non herringbone if you prefer, or other variants.
Filament spool holders are a good idea to fit on the top of the machine -
 3DR_NYLON_Spool_Holder_V2_001_with_bearing_RTP.stl
 3DR_PLA_Spool_Holder_V2_001_with_bearing_RTP.stl
3DR_PLA_Spool_Cover_V2_001_RTP.stl - (optional and experimental) - Print in PLA !
You can print out an external fan mount if you require -

1 x RichRap_3DR_80mm_Fan_cover_3DR_RTP.stl (or as many as you require)

1 x RichRap_3DR_80mm_Fan_mount_Part_A_RTP.stl (or as many as you require)

1 x RichRap_3DR_80mm_Fan_mount_Part_B_RTP.stl (or as many as you require)
And the XXL LCD display and SD Card case is highly recommended to finish off your machine -
This LCD case is a modified version of the excelent design by wersy - design here
 1 x 3DR_LCDXXL_Base_RichRap_V2_001_RTP.stl
 1 x 3DR_Top_Case_XXL_V2_001_RTP.stl
1 x 3DR_LCDXXL_Controller_knob_V2_001_shorter_RTP.stl
 1 x 3DR_LCDXXL_Kill_Button_V2_001_RTP.stl
 1 x 3DR_LCD_Adapter_RichRap_V2_001_RTP.stl
Mechanical Parts -
3DR uses a number of different bolts and nuts, the plan is to rationalize parts so less sizes are required.
The bill of materials here is not exact, and will be updated after I build up another 3DR, so take it as a guide, you may find you need a few more nuts, bolts and tie-wraps to complete the build.
The main frame supports are using Aluminium 20mm T-slot, but as all they do it strengthen the machine, you could change the design to use wood dowels, bamboo, steel tubes or even angle iron.
The smooth rods are 6mm in size, I would recommend using stainless steel here.
Smooth rods and Aluminium sections share a size ratio, you can build the 3DR almost whatever height you require, you just need to have the Aluminium sections +50mm longer than the 6mm smooth rods.
I would not recommend going over 1.0M in height, after that it may be better to change the design to 8mm rods.
My 'standard' sized machine seen in the photo's above uses 3 x Aluminium frame sections of 500mm long and 6 x 6mm stainless steel rods 450mm long. - this also gives a build height of approximately half the length of the smooth rod length.
I have also built up a 3DR with 650mm Aluminium sections and 600mm smooth rods without any issues.
Another key part is the universal joints used for the Delta arms.
I have used the smallest TRAXX Style joints - they are commonly available in model shops and are used for radio control cars, boats, helicopters as push-rods etc. The ones that are ideal for 3DR are using M2 threads and M2 Nuts, if you can only find M3 versions, they should still fit.

Universal joints
* EDIT - I thought I had added the link for these, I used the above from KC model accessories (UK) Many other's seem to also be available and should be compatible, if you find one that does not require the printed adapter parts (for example the 3mm carbon fiber rods could be directly inserted) - do let me know.
I'm also using standard 3mm carbon fiber rod (used on Kites and models) cut to size (110mm) and rod adapters (x12) to join the universal joints and rods together.

Printed joint and rod adapters.

Carbon Fiber 3mm rods - 110mm long

When assembled they look like this.

Examples of a ready made TRAXX universal push-rod you can buy with various lengths to use for Delta printer's if you don't want to make your own.
Other parts you are going to need include -
- 6 x M5 washers (connecting the Plastic parts to the Aluminium frame)
- 6 x M5 T-slot nuts for the Aluminium channel - I recommend getting more and adding them into all the channels so you can attach extruders, fans and other things to the machine
- 6 x M5 x10/12mm Socket cap or dome bolts
- 20 x M4 x12mm Socket cap or dome bolts for connecting most of the plastic parts together, and mounting the LCD adapter.
- 40 x M4 washers - use on the above
- 20 x M4 Crinkle washers - use on the above
- 20 x M4 nuts (You can use Nylock nuts in many places rather than the Crinkle washers and normal nuts, but you need at least 4 x normal M4 nuts to complete the build
- 10 x 3mm x 12mm self tapping screws - for the Hall-effect end-stops and LCD case.
- 8 x M3 x 20mm Socket cap or dome bolts - for the bed catches and mounting the electronics.
- 15 x M3 x 10mm Socket cap or dome bolts - for the motor's and extruder.
- 9 x M3 x 6mm dome bolts. I know a silly size, but they are for the Motor Filament spools - you could cut down 10mm ones if they are tricky to get.)
- 12 x M3 nut's
- 12+ Tie-wraps 3.2mm x 100mm for the carriages LM6UU's and tidy up electronics wiring.
- 3 x M8 nut's (one is used on the Top Boss for the filament spool)
- 1 x M8 Threaded rod x 120mm for Filament spool
- 3+ M8 plain Washers
- 3 x 608ZZ bearings
- 6 x LM6UU Linear bearings
- 4 x NEMA17 Stepper Motor's - ideally over 1.2M versions (look for 1.7A or 2.5A) max 50mm Long body.
- You should be able to use NEMA14 motors too, as the mounts are designed to fit both, but I have not yet tried NEMA14's so let me know if you try them out.
- 3 x Hall effect end-stops (I'm using RepRapDiscount versions, here)
- 1 x RUMBA Electronics (you can use other electronics sets, but 3DR electronic mounts are spaced for RUMBA).
- Megatronics electronics also fits nicely into the 3DR. RAMPS it a little high but could be made to fit with a small printed adapter.
- 4 x Pololu stepper motor drivers or equivalents
- 1 x LCDXXL display and SD card Kit
- 1 x M8 Hobbed Bolt
- 1 x J-head MKV 1.75mm or similar / equivalent kit for Hot-end (heater cartridge / resistor / thermistor / thermocouple)
- 1 x Teflon tube 4mm outer 2mm inner x 500mm long
- 2 x 1/8" Pneumatic fittings (metal or plastic) 4mm Tube size
- About 6M of Spectra Line 90Lb (0.5mm) fishing line - or other options that are similar.


- Material for the Build platform, it's a ~170mm circle 3mm thick - ideal materials are Di-bond, Aluminium or Tufnol. - Glass if you can get a round or hexagon shape.
- 1 x USB cable.
- 1 x 60W or higher DC 12V power supply (Brick)
- Mains cable for your country.
- Various wiring requirements for electronics (I'll go more into that in the next post)
- Some 1.75mm PLA or Nylon Filament.
- Probably some tape, glue, bit of luck and beer / tea / coffee, as you like.
That's Part 1, start printing parts and sourcing bits, I'll see you in Part 2.
In the next post (Part 2) we will do preparation of the parts, assembly of the main machine and extruder.
In Other news -
It feels really good to release 3DR, and yesterday for a break from documentation and to do something a little different, I finally started printing a set of Jo Prusa's i3 parts. -
I'm using this machine build to 'celebrate the layers' of our printing progress.

In very funky Rainbow Colours - should be an eye catching machine
The i3 is a machine I have been meaning to build for quite a while, now don't you just love RepRap and this great community :)
Received my pre-ordered Leapmotion the other day, it's working really well, even better than I had imagined. Could be very interesting for virtual 3D modelling at some point in the future - Imagine virtual clay sculpting or pottery wheels!
RepRap Community meeting Hub at the TCTShow Birmingham (UK)
Preparations for the show are well under way, it should be a great RepRap Event!
It's free to attend, but you need to register - do that here.
Thanks for reading, back again soon, and do let me know what you think of 3DR and if you decide to build one.
Cheers,
Rich.
Awesome post RichRap!
ReplyDeleteHow is your Prusa i3 doing? I just managed to get our working! Here are some wip photos;
http://azarebska.wordpress.com/2013/06/21/diy-drukarka-3d-prusa-i3/
Hi Rich,
ReplyDeleteThank you for releasing your design. Would you recommend this for a first build? Also, I'm not sure if I can source the Aluminium 20mm T-slot here in the Philippines. If ever it's not available, which parts do I need to modify if I'm going to use something else?
Erwin
Hey, I was wondering if these T Slot parts would work?
ReplyDeletehttps://www.inventables.com/technologies/aluminum-extrusion
Hi Rich,
ReplyDeleteGreat to see the design released, have been quite intrigued by these deltas, looks
like 3DR is a perfect way in.
Done a quick estimate on hardware cost, looks like it could be done for around £175'ish (will have to be homemade Hall effect sensors though), well that's the goal I've set myself, <=50% the cost of the wood frame i3 I've just built. We'll see how it goes.
Only had my box frame i3 up and printing for a week, so I don't fancy my chances of
getting some of those parts printed warp free (ABS & E3D hotend, not sure whether to
get a reel of PLA or not, may get grief with the hotend, there again it won't be
wasted could use it on the 3DR with a J-head), so I'm may build the base & top from
wood, will have a think.
Anyways, great work as always Rich, cheers for your time and effort getting this
out. It looks like the 3DR could help with overcoming one of the major
barriers to entry for people and new tech, The cost.
Thanks for this lovely design. I've start to print myself a set of parts and am going to build one! :)
ReplyDeleteA few comments about the STLs:
Slic3r complains about holes in herringbone-gear-large and herringbone-gear-small, can you upload fixed versions? I ran them through Netfabb to repair, can share if it helps.
Which infill settings you do recommend for the extruder body, guidler, and gears? I sliced them using 65% line infill, does that sound reasonable?
Where are the files for the LCD case? I can't find them in the repo.
Very nicely done!
ReplyDeleteAgain!
I might add!
Regarding the filament mixing you use. What kind of 3d format would work best for mixstrusion?
Multiple shells like dualstrusion? (and allow for the mixing process to blur it out)
Or rgb/grayscale color models where you determine the mix ratios based on surface color?
What is your minimal travel/print distance in which you can distinguish color change? Or is it still limited to layer wise coloring only?
Would love to try and design something for mixtrusion.
But someone would need add the capabilities to the slicer *grin*
Hi Rich, Love the printer, I have only been 3D printing for about a month but have already been making plans to build a second printer, I was planning on a Rostock but now I have seen this i am going to go a head and build it.
ReplyDelete1 thing though I am really struggling to understand how the device works out how much of each motor to move to make a move in the direction of X, Y and Z. I can imagine it also changes relative to the angle it is at from the other motors, so it must be quite an advanced firmware. How do you calibrate it to ensure its moving how it thinks its moving. I'm also assuming that the length of the Traxx and the distance between the columns must all be programmed into the board what if these are slightly different?
Hi Rich,
ReplyDeleteAre the 110m carbon rods actaully rods or tubes ? the printed rod/joint adapters look like they have a hole for a screw/bolt at the rod attachment end ? Am about to purchase so just wanted to make sure.
Awesome looking printer, I'm printing the parts as I type. I can't wait to get this up and running.
ReplyDeleteSorry to ask this as it may be a silly question but why did you choose 1.75mm and not 3mm as it would be easier for me to only have to buy one filament type. And would using 3mm potentially stop being able to use a multi extruder setup?
Wath is the built volume?
ReplyDeleteI'm printing and sourcing parts. Slow going because of work, but looks good so far :) But I have trouble finding the TRAXX Style joints, as there are so many different parts sold Traxxas. Could you share the Traxxas part number or a shop link? That would help a lot... I already have a set of "Traxxas 5347 Rod Ends with Hollow Balls Large Revo" as required for Kossel. They look similar, but not identical to yours, and they don't fit the printed adapters.
ReplyDeleteThis is outstanding work RichRap! I love how tidy it looks.
ReplyDeleteThe ball links look like these >>
ReplyDeletehttp://www.ebay.co.uk/itm/SINGLE-END-KNUCKLE-EXTENDER-SWIVEL-JOINT-x2-pcs-/160740546853?pt=UK_ToysGames_RadioControlled_JN&hash=item256ce21925
Hi Rich.
ReplyDeleteI've been trying to make my way through the labyrinth that is the world of consumer 3D printing, and this led me to the labyrinth that is the world of RepRap.
I've been going over every design and really had no idea where to begin, then I came across your new 3DR and it just spoke to me, he he. I like your approach, I like how much experience you bring to it and how thought-out your design was, building on what you know and like and adding what you felt was missing.
Thus, I've pretty much settled on building the 3DR, but I was wondering if the printer is scale-able. For what I have in mind for my printing a relatively large build envelop is important. Would I be able to use your plans to build a larger version of the printer?
Any light you could shed on this would be greatly appreciated!
Thanks in advance!
benldt.
No Word for this invention. It is awesome.
ReplyDeleteWow!
ReplyDeleteIm totally stunned by this printer!
Perfect size, lovely wiring, clean setup, awesome small footprint..
What can i say, preparing to print some parts ;)
Looking very much forward for the next updates!
Thx a lot for sharing this and all ur other work with us!!!!!!
VERY nice design, hats off and thanks for your work...
ReplyDeleteProgressing fast, printed parts are almost done and all hardware (alas except the RUMBA board) ready for assembly.
Rich, two questions:
- what's the total length of the connecting rods (measured from eye to eye centers), 155 mm?
- could you upload your Configuration.h (and probably other required changes to Marlin V1) to Github etc.?
Kind regards
HaDe
Was about to try a mendelmax build but thats history after seeing this, very nice use of printed parts.
ReplyDeleteNow i just need to alter aluminium and 6mm holes to my parts, time to forget freecad and start learning sketchup urg.
Just wanted to leave my two cents.
ReplyDeleteI have built most of the parts and weighted them. For the parts I have not built, I indicate estimated weight. For those of you asking for that, here it goes:
3DR_Bottom_Motor_Mount_V2_001_RTP -> 82g
3DR_Top_Electronics_Mount_V2_001_RTP -> 54g
3DR_Top_cover_cap_V2_001_RTP -> 23g
3DR_Top_Boss_V2_001_RTP -> 8g
3DR_Bottom_Boss_V2_001_RTP -> 33g
3DR_Spool_V2_001_RTP -> 5g
3DR_Carriage_V2_001_for_LM6UU_RTP -> 5g
3DR_Jhead_groove_mount_V2_001_PUSHFIT_RTP -> 12g
3DR_micro_platform_V2_001_RTP -> 7g
3DR_Print_Bed_catch_V2_001_RTP -> <1g
3DR_RichRap_joint_and_rod_adapter_VERSION2_001_RTP -> <1g (estimated)
3DR_Extruder_body_V2_Test_001_RTP -> 38g
RichRap_Greg_style_Guidler_Modified_with_grab_lever_For_1_RTP -> 10g
herringbone-gear-large -> 15g
herringbone-gear-small -> 3g
3DR_LCDXXL_Base_RichRap_V2_001_RTP -> 44g
3DR_Top_Case_XXL_V2_001_RTP -> 38g (estimated)
3DR_LCDXXL_Controller_knob_V2_001_shorter_RTP -> 1g (estimated)
3DR_LCDXXL_Kill_Button_V2_001_RTP -> <1g (estimated)
3DR_LCD_Adapter_RichRap_V2_001_RTP -> 11g (estimated)
I also would like to point a couple of notes for other 3DR builders out there:
.- I tried to fit self locking nuts in the top and bottom bosses, but they didn't fit by a bit. I would recommend to have that into account when purchasing materials and add six more plain M4 nuts to the list.
.- As rich points, the list of materials is provisional, I would like to add to the list of missing parts the following:
.- two M3x60'sh screws for the extruder guidler.
.- two springs, not sure about the specific dimensions to go with the above, and washers to push the springs (you can see this in the video at 7:47) and possibly two M3 nuts.
.- The bearing in the guidler seems to be held in place by some sort of rod, which also seems to be missing in the list.
I also have some questions:
.- How are the fishing lines assembled/tensioned?
.- Where do they roll
.- are the springs between the rods needed? if so, what kind are they and why are they needed?
Once again, thank you very much for releasing such a great printer, I am enjoying the build process, this is the first printer I'm building, in fact I'm doing two, one for me and another for a friend. Rich, how much time do you estimate for the next posts? I'm anxious to finish the machine ;-)
Cheers,
Pedro
Hi Rich,
ReplyDeleteThis is really great!!!
Can it be connected through laptop / PC.
I want to have one in India :). Kindly suggest me how can i buy one or make one.
Regards
Chandresh
Finished my 3DR build this weekend! Well, almost...
ReplyDeleteRegarding the diameter of the build platform: ~180mm (as given in the BOM) will not fit, should be 170mm or less as far as I can see. No real problem, I mounted the 180mm glass plate with double sided tape for now (although it protrudes into the cutout for the Spectra drive a little bit).
Those linear bearings are noisy! Tried identically sized Igus plastic bearings (RJMP-01-06, see http://www.igus.de/wpck/default.aspx?pagenr=7188&C=GB&L=en) which run very smooth and much quieter, but alas are more sensitive to side forces caused by small tolerances in the distance of the two smooth rods, resulting in higher force required to move the carriage. I went back to linear ball bearings for now but will try the Igus bearings again some time (using a modified carriage with slightly less distance between the bearings).
Anyone else noticed that the connectors are incorrectly labeled on the reprapdiscount XXL display unit? It will work only if connecting EXT1 on the display to EXT2 on the RUMBA board and vice versa.
Rich I think you mentioned this somewhere already: the bottom Spectra drive spools are too long and will bind (a little grinding took care of that).
Looks very nice so far, but alas I have troubles setting up the Marlin firmware correctly... homing moves run correctly for all three motors (so the basic setup and hardware settings should be ok), but delta moves seem to have a problem: Y and Z motors run as they should (as far as I can see) but X (left front) either will not participate, or sometimes start to run with constant speed and never stop...
Rich (or someone else who got the 3DR up & running already): would you mind posting your Configuration.h (and probably other files which had to be modified)?
Thanks for all the comments and questions everyone - sorry I could not answer all of them so quickly, it's been one of those busy times.
ReplyDeletePart 2 is posted now so take a look and hopefully I have answered a lot of questions and maybe made a few new ones. Post 3 will not be too long and I'll tidy up the firmware and post that too.
And yes EXT1 and EXT2 are swapped over on the RRD XXL LCD for some reason.
How do you know which t-slot to buy ?
ReplyDeleteI've looked online, and the inner dimensions vary from one vendor to the other.
are you selling just the printed parts kit? im not able to print yet been waiting on my makibox for a year now and thinks its time to move on. is there anyone willing to print the items out and ship to USA??
ReplyDeleteHi Rich,
ReplyDeleteJust a quick question on the design, is there a specific angle that the carbon rods have to be to the micro platform/ bearing carriage? Say if I wanted to create a bigger build platform, is there a specific ratio that I would have to extend the carbon rods to keep everything aligned and moving freely?
Thanks, Dan.
awesome !!
ReplyDeletei appreciates the choice of words being used in this post and would like to add my experience being a user of such products. I too uses a printers
. its a useful product for the people who has a high load of printing work in offices and home.
Hi Rich,
ReplyDeleteEven been sourcing out for materials last couple of days. Ive decided to dive in as well.
I like the design of your 3DR especially because of the relative cheap frame work .
I got an i3 standing here , printing 3DR parts next couple of day's
I will start in PLA , maybe ill go for ABS later for the bottom parts
Regards
Martin
http://www.thingiverse.com/HeAdWaVe/overview
About the steppers..
ReplyDeleteMost steppers in repraps seems to be High Current, low voltage..
You are specifying them in amps, but how much holding torque should i aim at?
Eg:
42BYGHW208 is 12V, 0.4A and 48OZ-IN
17HS4401N is 3.4V, 1.7A and 48OZ-IN
Where can one find these hall effect sensors? they weren't included in your parts list above.
ReplyDeleteThis written piece gives fastidious understanding yet.phlebotomy programs
ReplyDelete3D printing, commonly known as ‘Additive Manufacture’ is a form of rapid prototyping where models are made layer by layer without the use of moulds.
ReplyDeletea0 Printing
Hi Rich any change that you will release a version for use with 8mm rods, there a version around on the web, but some have not been tested or have altered other stuff on the base.
ReplyDeleteTried to do it myself with skecthup, but I keep failing to understand how skecthup works.
You can find ball links that don't need an adapter here: http://hobbyking.com/hobbyking/store/uh_listCategoriesAndProducts.asp?cwhl=XX&idCategory=122&v=&sortlist=P&LiPoConfig=&CatSortOrder=asc
ReplyDeleteI was told that those have a decent quality: http://hobbyking.com/hobbyking/store/__8232__Ball_and_roller_link_6_3x2x27mm_10pcs_.html
The holes are smaller than 3mm but there is enough material that you can widen them with a drill.
HTH